SQL Server 2012 High Availability - Synchronizing Database
1. Architecture:
In our lab, we'll use 3 Virtual machines:
- SRV1: Active Directory.
- SQL1: Principal SQL Server.
- SQL2: Mirror SQL Server.
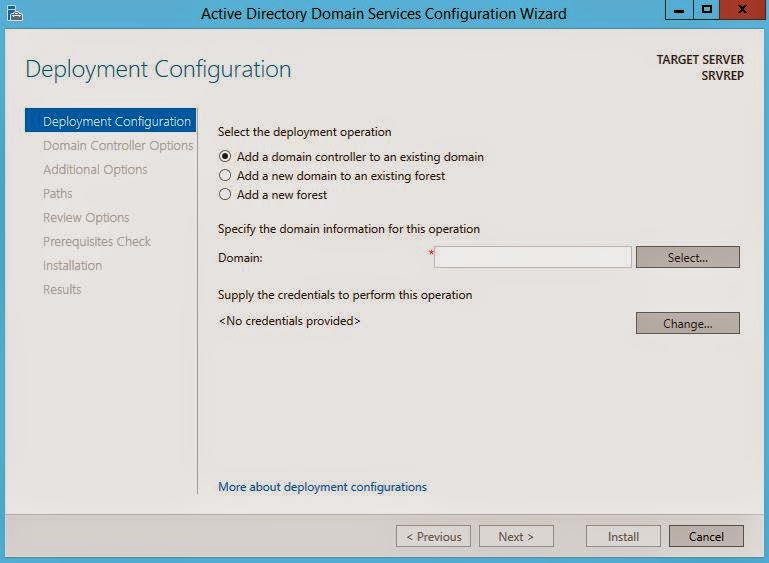
3. Installation:
3.1. Installation prerequisites:
I'm using
hyper-v to create virtual machines. All virtual machines are running
with Windows Server 2012 R2. I will setup SQL Server 2012 Enterprise
Edition.
3.2. install Clustering feature:
We will install Clustering feature in each of SQL1 and SQL2.
In Server Manager, Click on "Manager" - "Add Roles and Features"
Select "Failover Clustering"
In start Menu, open "Failover Cluster Manager"
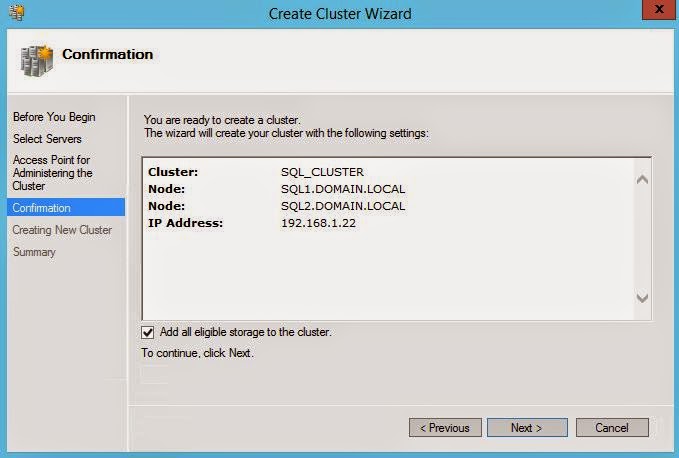
Create a cluster
Add the two servers SQL1 and SQL2
Give a name to the Cluster and enter an IP address
Now our cluster is ready
The next step is to create the Quorum, I'm going to use a share folder and I will create it in another server, not SQL1 or SQL2, so I will share a folder in Active Directory Server.
In the "Failover Cluster Manager", right click on the cluster name, "More Actions" then "Configure Cluster Quorum Settings"
Choose "Advanced quorum configuration"
I'm going to configure a share folder for the quorum
After creating and sharing the folder, enter the server name and select the folder
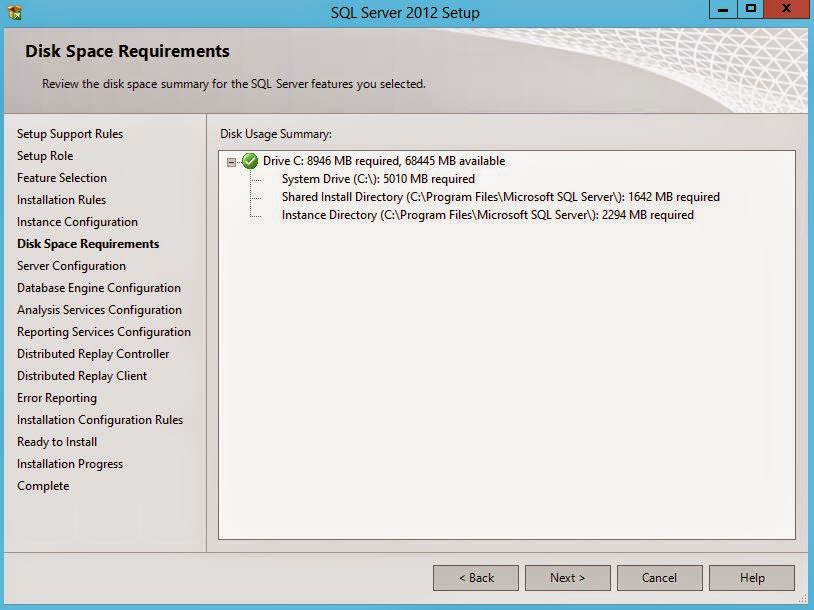
3.3 Installation SQL Server 2012:
Install SQL Server 2012 in each Server (SQL1, SQL2)
3.4. Database configuration:
I'm going to use "AdventureWorks" database, you can download a sample from here.
After downloading the sample, you need to unlock it and copy it in the DATA folder of SQL Server.
In this step we are going to make the configuration only in primary server SQL1.
Attache the database in SQL server
Right click on the database, "Attach"
In the attaching step, remove the log and click OK.
Next, right click on "AdventureWorks" database and change the recovery mode to "Full"
Now, we need to backup the database, otherwise you cannot join the database to the high availability group.
3.5. Configuration High Availability Cluster for SQL Server:
Some changes in the SQL Server Service are needed for the cluster, so go to "SQL Server Configuration Manager" - "SQL Server Services" - "SQL Server (MSSQLSERVER)"
Right click on the service the "Properties"
Go to "AlwaysON High Availability" tab and check "Enable AlwaysOn Availability Groups"
We need to restart the service to take effect the changes
In "Log On" tab, Change the SQL Server Service account, this account should has the right to access to the two servers.
Restart the SQL Server Service.
3.6. Configuration High Availability Group:
Go to "AlwaysOn High Availability" - Availability Groups"
Click on " New Availability Group Wizard"
Give a name for the group
Select the database that you want to join, in our case "AdventureWorks"
Add the secondary server, click "Add Replica"
Enter the name of the secondary server (SQL2)
In "Replicas" tab, select "Automatic Failover", "Synchronous Commit" and change to Yes "Readable secondary"
In "Backup Preferences" select "Prefer Secondary" and change the pariority of the second server more than the primary.
In "Listener" tab, create a listener, give a name for the lister, IP address and a port. Our case I will use port 1433
Create a shared folder in SQL1
Click Next
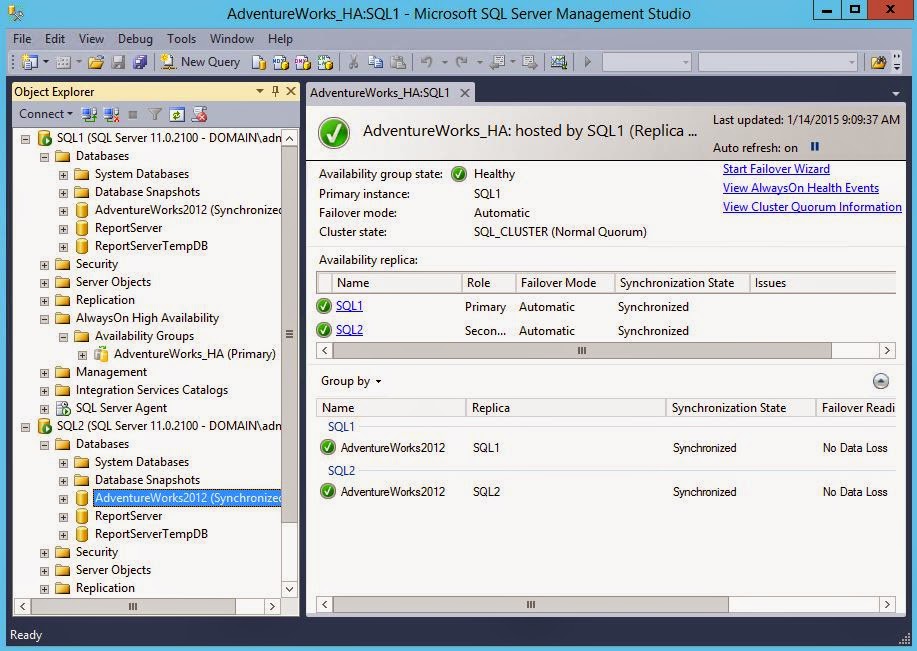
Right click on the Availability Group and check the dashboard
Our Database is synchronizing. To check if the failover is working I will reboot the primary server and see if the database will move the secondary server SQL2
After rebooting the Database "AdventureWorks" is on SQL2