Configuration Microsoft Dynamics CRM for Outlook 2013
In this tutorial we will enables access to your CRM data through Outlook. To set up CRM for Outlook on a user’s computer you have to follow the below steps.
1. MS Dynamics CRM configuration access:
First you need to access to Dynamics CRM through Internet explorer

Go to "Dashboard" - "Settings"

In "Settings" go to "Administration"


In "Administration" page click on "Users"

Click on "New" to create an access for the user


In the "User Name" field enter user account

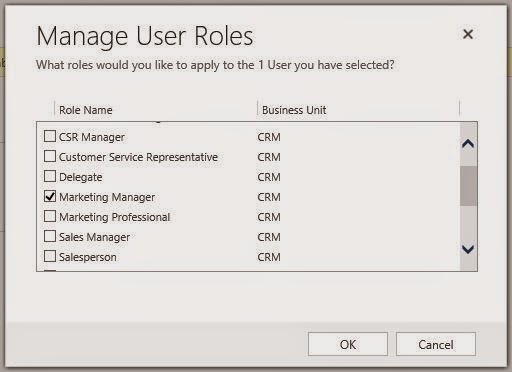
After you add the information of the user, you need to assign a role access. Go to the options menu (like it shows in the screen-shot) and click on "Manage Roles"

For example, I give "Marketing Manager" role to the user
No the user has access to Dynamics CRM
2. Configuration Outlook access to Dynamics CRM:
In the user Windows session, open the URL of Dynamics CRM in Internet Explorer. After Logging in a message shows up "Get CRM for Outlook".
You must have Internet connection.

After clicking on the message a download message will appear

Select a fold where the CRM install will be saved

After the download, start the CRM install


After finishing the install, open outlook and a CRM Window will appear to configure the organization. If not go "CRM" tab and click on "Configure Microsoft Dynamics CRM for Outlook"

In this step, use the URL of CRM. If you want to use CRM with external access use the public URL.
Our case we will enter the internal address.

The other fields will be filled automatically after clicking on "Test Connection"

You will see the CRM tab under your mails


No comments:
Post a Comment